Tracking
Note: This guideВ is partially out of date. The UKHAS guide has someВ more up-to-date information and is available here: http://ukhas.org.uk/guides:tracking_guide
Project Horus payloads transmit flight information on the 70cm band during flight, which can be decoded by anybody within range who has an appropriate setup. The decoded data is forwarded on to a central tracking server, which plots the live position of the payload on a Google Maps based map, which can be accessed here.
If you'd like to help out with tracking, you'll need the following:
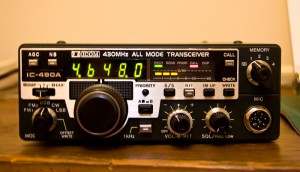
- Radio capable of listening on the 70cm band in SSB (USB/LSB) mode
- Suitable antenna - whip, yagi, dipole, etc for ~434mhz
- A PC running Windows, Mac OSX, or Linux
- An audio cable to connect your radio's output to the input of your soundcard
- Decoding software (dl-fldigi)
Setting up the tracking software:
To decode the RTTY transmitted, dl-fldigi is reccomended. dl-fldigi is a distributed listener modification the fldigi, an open source radio decoding package.
Start by downloading & installing dl-fldigi for your operating system - see above.
You'll need to run dl-fldigi in HAB mode. The first time you open dl-fldigi you'll be presented with the welcome wizard. Click next to begin the configuration.
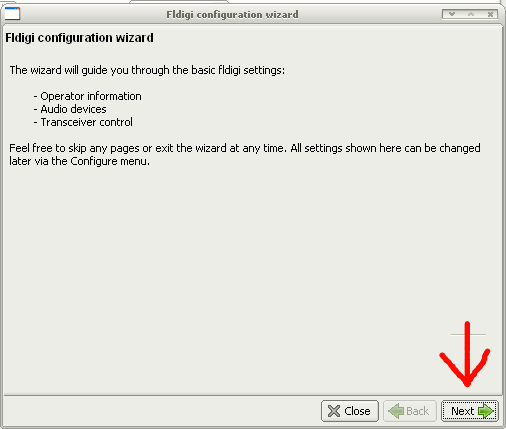
Config wizard
You'll need to enter some information so that the tracker is able to keep track of information your client sends on. Enter your callsign, name (or nickname), as well as some information about your rough location & the radio gear you're using. If you don't have a callsign, you're free to makeup whatever you like in the callsign field.
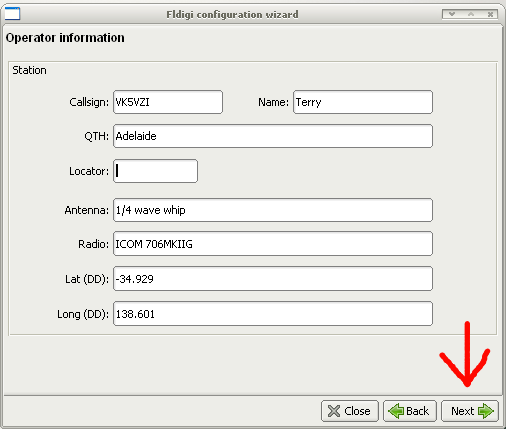
Operator configuration
Next dl-fldigi will prompt you to setup your sound input device - you'll want to select port IO here, and make sure the recording device lines up with your sound card input. Once you've done this, hit the settings tab at the top of the window.
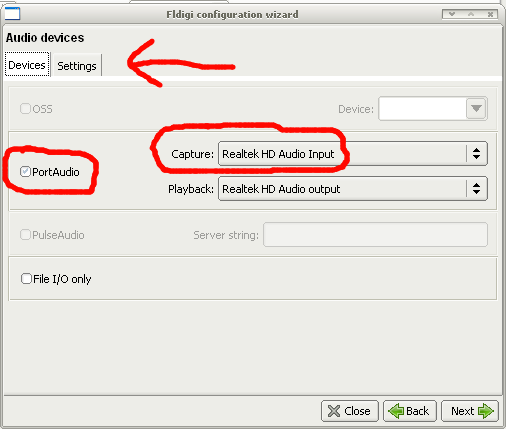
Soundcard configuration
In the settings dialogue we'll configure the interpolator that dl-fldigi should use - so long as your pc has a modest processor (1.5ghz or more), you should be able to manage the moderate sinc interpolator. If you have a powerful machine, you can try the best sinc interpolator - though this does have high CPU overheads.
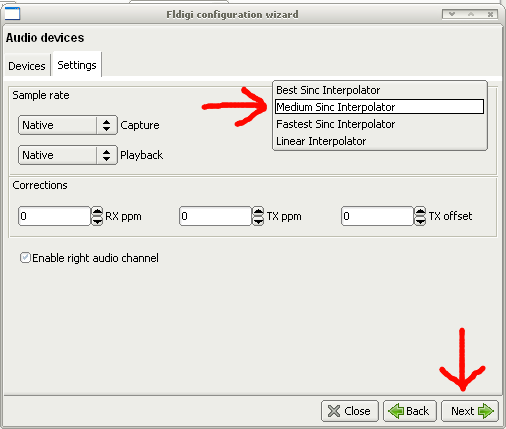
Selecting the interpolator
The last screen in the setup dialogue relates to hardware control (rigCAT) - you can safely skip this by hitting finish.
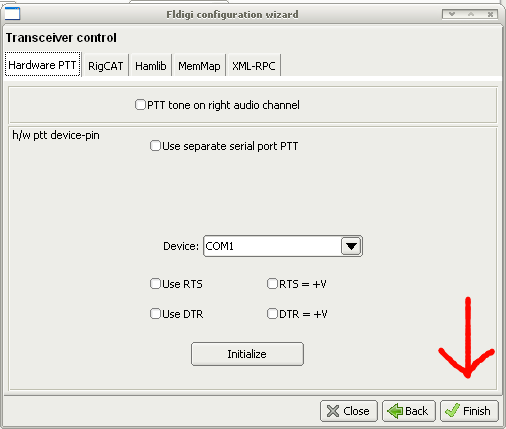
Finishing the config wizard
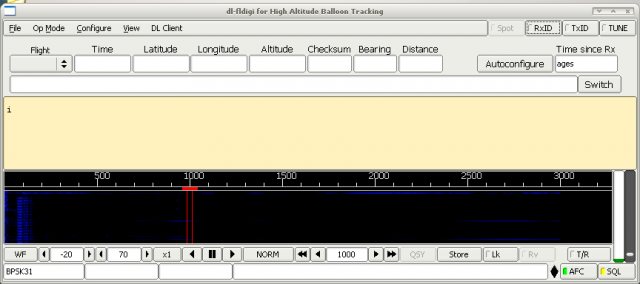
OnceВ you've finished the setup wizrd, you'll be presented with the dl-fldigi main screen:
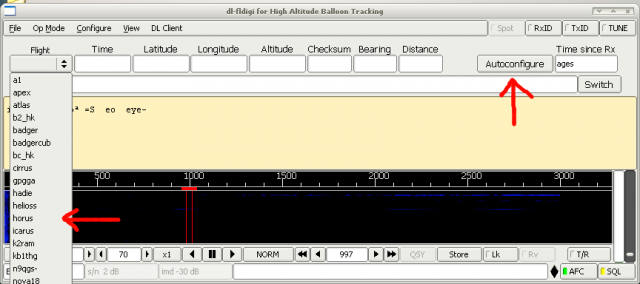
The first thing to do is select horus from the payload list and hit the autoconfigure button:
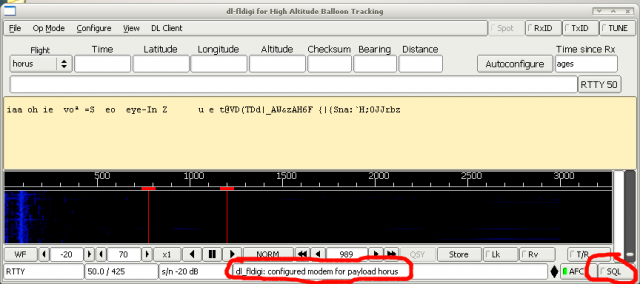
Once you've hit autoconfigure, dl-fldigi will let you know that it's configured itself as per the payload settings in the status bar. Once this is done, make sure SQL is turned off (no light), or you may have difficulty decoding sentences.
dl-fldigi is now configured for extraction, but there are a couple of things we can do to improve decoding performance. Start by selecting op mode -> RTTY -> custom:
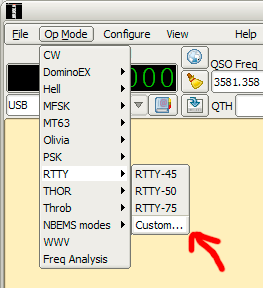
RTTY mode
This will present the options for the RTTY decoder. The transmit module used on the Horus payloads tends to exhibit a bit of thermal drift, so it pays to have the AFC functionality in dl-fldigi working well - it's worth increasing the AFC speed to fast. Another thing you can try is to increase the rx filter bandwidth - this will make your decoding more tolerant of sudden changes in frequency, at the expense of losing some performance in decoding very weak signals - you can experiment with the RX bandwidth to determine what works best for you.
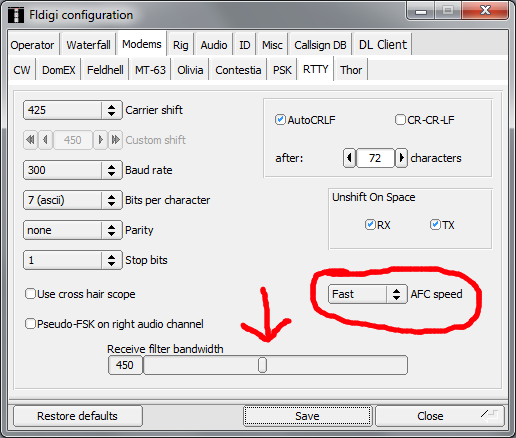
RTTY decoder options
Tuning your radio & decoding data:
Decoding telemetry data from Horus requires a radio cable of operating in SSB mode on the 70cm band.
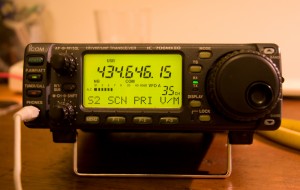
Horus broadcasts on a nominal frequency of 434.650MHz - to listen in, you will need to tune your radio either slightly below this frequency (in USB mode) or slightly above (in LSB mode). There is no advantage to either mode - I usually use USB (Upper Side-Band).
Given that SSB is being used and the transmitter onboard will be exposed to temperature extremes, the transmit frequency will probably shift somewhat during flight. At room temperature, 434.645 - 434.648MHz is the ideal range to be in. If your radio has an AFC feature, it may be worth using. Otherwise, you'll need to re-tune your radio if the frequency drifts outside of your receiver's bandwidth. It's also worth making sure that your radio's squelch is turned right down, as the signal may be quite weak depending on your location.
Once your radio is tuned in & you can hear the signal, you can connect the headphone jack of your radio to the microphone input of your PC. Adjust the volume of your radio so that you can see the 2 bands in the waterfall window clearly, and tweak the tuning so that the bands are towards the middle of the waterfall screen.
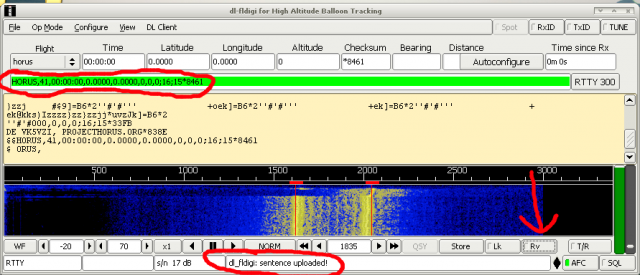
If you've setup dl-fldigi correctly in the previous step, you should be able to use your mouse to position the 2 red bars in the waterfall directly over the signal bands. This tells dl-fldigi which part of the audio spectrum it should try to decode from. Once you've positioned the bars in the right place, you should start to get some text appearing in the incoming (yellowish) text field - though it may not yet be valid data. dl-fldigi may take a few seconds to start decoding valid data, or you may need to toggle the RV button.
Once a valid string has been decoded and uploaded, dl-fldigi will highlight the extracted data in green - success!
Once you're done with setting up, you can follow the balloon here!
